Merchant Game
Devlog #2: Adding a Mission Table
Hey guys! I thought I'd update you on some of the progress I've made lately on the game. It's slowly, but steadily coming along and I am starting to see the main components take shape. This week I'll be talking to you about the Mission Table and how I've programmed that into the game.
Mission Table Skeleton
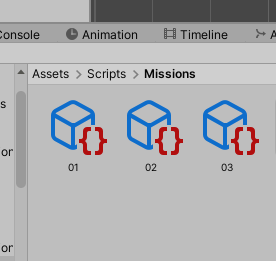
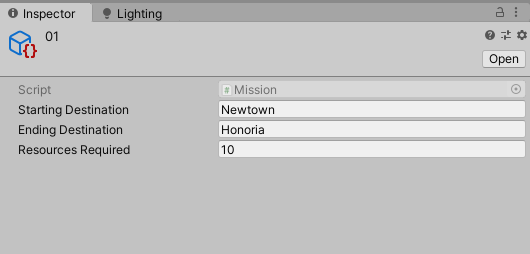
The mission table is created using scriptable objects in Unity 2D. I have written a C# script that contains serialized fields for three different values: starting destination, ending destination, and resources required to run each mission. Since the fields are serialized, I can edit the values easily in the Inspector.
I've mocked up three missions using this script which you can see here.
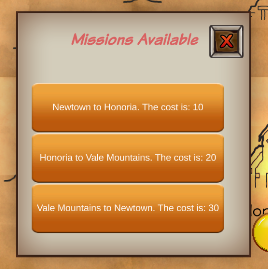
Creating the Mission table prefabs
This was a rather intense process of working with prefabs to create the Missions UI system. I have two main prefabs-- the Mission list component and the Mission prefab itself. Attached to the Mission list component is a script which checks the number of missions currently in the game and then instantiates the required number of Mission prefabs at runtime.

Filling out the Mission text fields
The Mission Item UI script is attached to the individual missions. It references the scriptable object for the missions and fetches the three values mentioned above (starting destination, ending destination, resources required). It then concatenates these values into a string and prints them on the mission buttons. The end result is that each of the instantiated Mission prefabs has different text.
Matching the mission string name with the correct scriptable object
This was a challenge because I knew I needed to find a way to match the string name of the button clicked with the correct scriptable object for that mission. I ended up running a for each loop for each of the missions in the game and finding the right object, assigning it to a variable, and then fetching the resources needed to run that mission in another method. 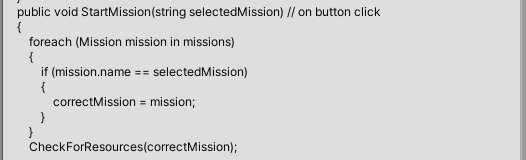
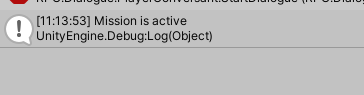
Printing to the console whether mission is active
The final step is to check whether or not the player currently has enough resources to start the mission. A simple if statement takes care of this. If there are enough resources, the game prints a "Mission is active" message to the console. As of now, the game doesn't have a way of spending resources; it only checks to see if there are enough resources to run the mission. The ability to spend will come in a future update!
Conclusion
If you've read this far then thank you! I know this was a tech-heavy post but it's a good way for me as a developer to see how far I've come. Through this process I've become a lot more comfortable working with scriptable objects in Unity and also passing in values so that there is better cohesion between my scripts. I can't wait to see what I do next with this game.
See you in a future update!
Leave a comment
Log in with itch.io to leave a comment.